I guess I'm short bus slow in a way though, because once I learn how to do something, I don't then move on and try something new. I tend to turn into this born-again Christian zealot, except replace 'Jesus' with 'McCall's' or 'Simplicity'. So here was the first taste of the crack, that high that kept me coming back for more. It was the baby coat. It really wasn't fair; what doesn't look super adorable in miniature? Except, well, you know....heh heh heh.
When you think coats, I bet you don't think 'easy'. When I say 'my cousin Erin', you probably think easy. But shocker of all shockers, coats were way easier than I had ever thought they'd be. Seriously, it's not the crack talking! Especially this coat for baby Mary. Here is the pattern:

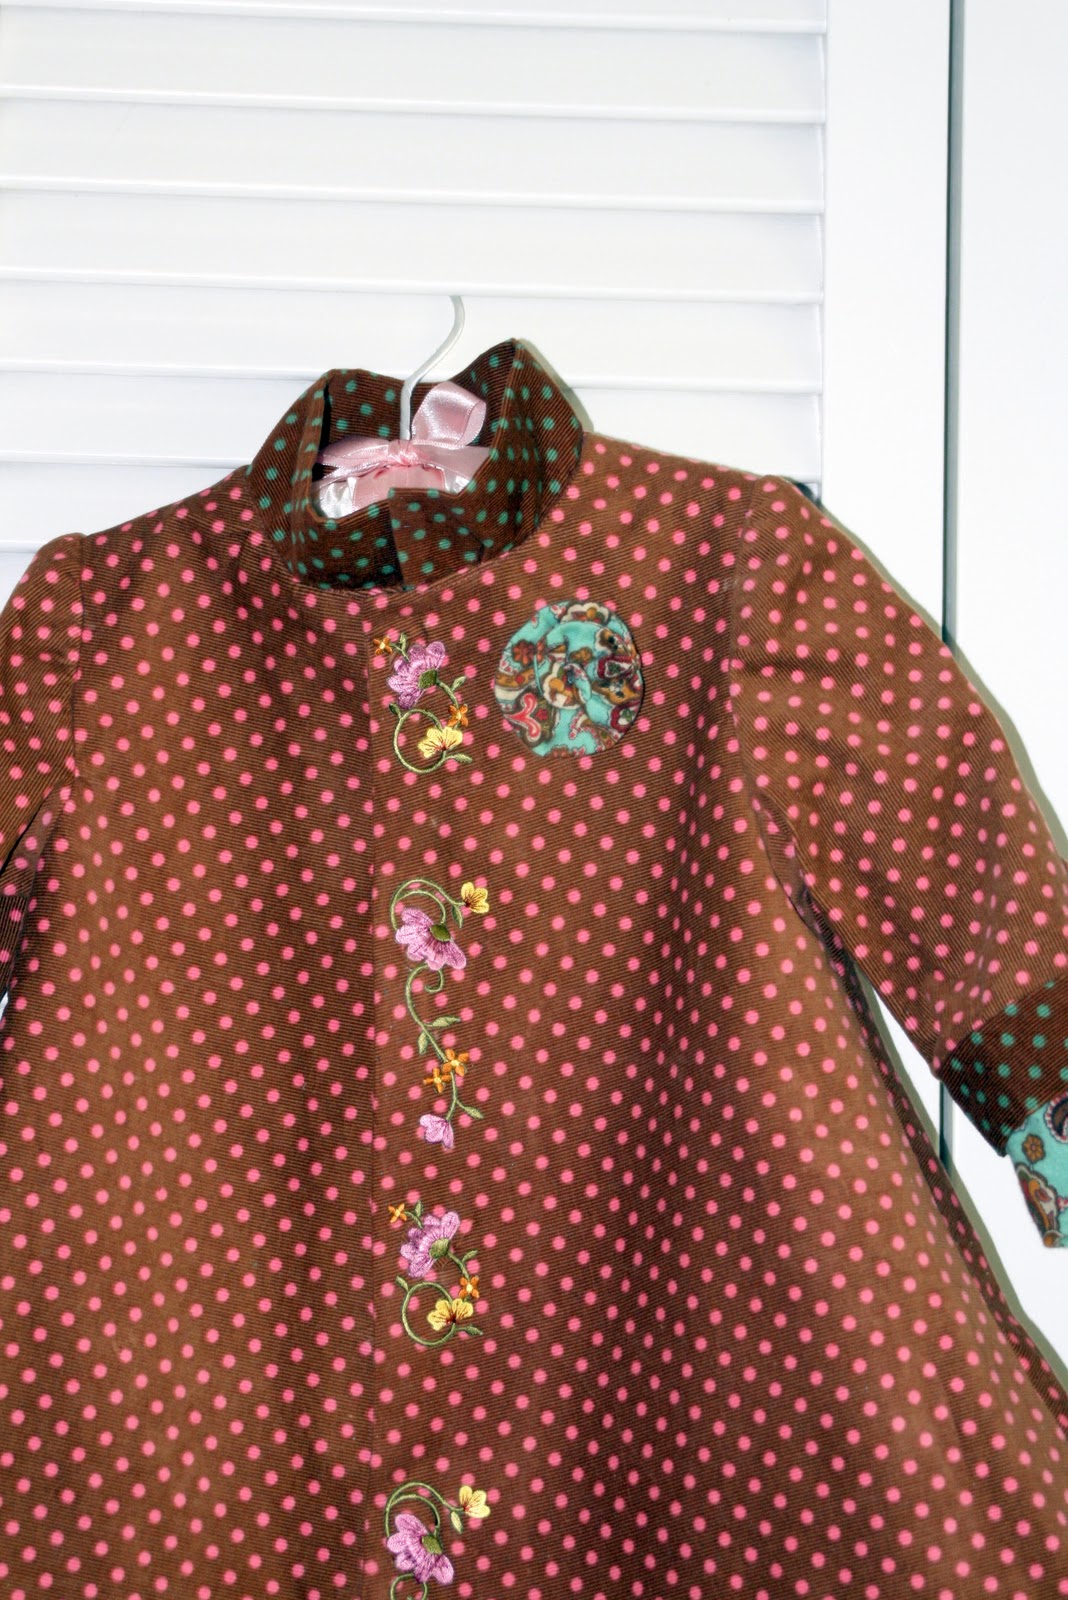
For the material, I had bought this lightweight corduroy material when the baby was born for both Abby and baby Mary, I just never knew what to make with them. Now that she was 18 months and walking and fall was approaching, I figured I'd make some lightweight coats for the two of them. Baby Mary's coat was made of the brown with pink polka dot fabric and lined with the teal paisley flannel. I used coordinating fabric from Abby's coat that was brown with green polka dots for accent and then finished it with an iron-on applique to cover up the snaps down the front.

For Abby's coat, I used this pattern:

For accent, I used the same paisley flannel and some of the fabric from baby Mary's coat but also added in a turquoise satin for the lining and other embellishments. Once I had finished the basic coat, I had thought of doing 3 layers of ruffles going down the front and around the bottom like I had seen on this magazine cover:

But once I had it pinned on, it weighed so much that it made the jacket pull to one side and it didn't really have a whole lot of shape to it. Shrimp came over to try it on since they both have super-sized fun bags so we could see how it hung on a real person, not just the dress form. Shrimp agreed that it needed something to break up the 'boob mound' and nixed the ruffles. Instead, we took the fabric from the paisley ruffle, turned it into a belt, and then made some fabric rosettes to stagger along the bottom of the coat.


I LOVED this when it was finished. I gave some serious consideration to keeping it for myself and getting one of those fake babies to wear the coat since it was too small for my dog. But alas, I packed up these puppies and sent them off to Maine.
The baby coat was still a little long for Mary since she is so teeny but Abby's coat seems to fit her well. The 'what not to do next time' thing I learned from making Abby's coat was to not sew down the inside lining to the bottom of the coat. I spent a lot of time sewing Abby's liner in and there are a few spots in the coat where it seemed like the lining pulled and caused the coat to pull under. Getting the length of the lining to match the length of the coat was almost impossible so in my next jackets, I just didn't do it. I hemmed the outer shell, then hemmed the lining, and attached the lining everywhere except the bottom. It worked out great with none of the pulling that I saw in Abby's coats. But check these two out; so fricking cute!


You kind of hate them a little for being so perfect, right? We're okay with that. We like being so cute people kinda hate us. What girl doesn't? If you answered 'me', then you've probably never inspired that feeling in others before. I hope you're good at math because life will be hard for you, my friend. Good luck on the coats! If anything, they can distract people from your face if needed!
1 comment:
OMG your hilarious! I LOVE this coat!
Post a Comment